How-to
DIY Wall-Mounted Folding Table With Folding Brackets: Plans, Cut List, Mounting
A DIY fold-down table is a flat top on two folding shelf brackets, screwed into studs or into a ledger board across studs. Plan in this order: find the studs, set the bracket spacing to a multiple of the stud spacing, choose brackets close to the depth of the top, then cut the top. You need a drill, a stud finder, a level and a saw.
Disclosure: This page contains affiliate links (marked with *). If you buy through them, we earn a small commission at no extra cost to you. As an Amazon Associate I earn from qualifying purchases. Learn more
The short version
Measure the stud spacing (16 or 24 inches on center), place two folding brackets on studs a multiple of that apart, and cut a top as deep as the bracket arms and wider than the bracket spacing with equal overhang. Mark the underside of the top below your chosen top edge, screw the brackets into the studs with fasteners rated for the load, then fix the top and check that both latches lock.
What you build and how long it takes
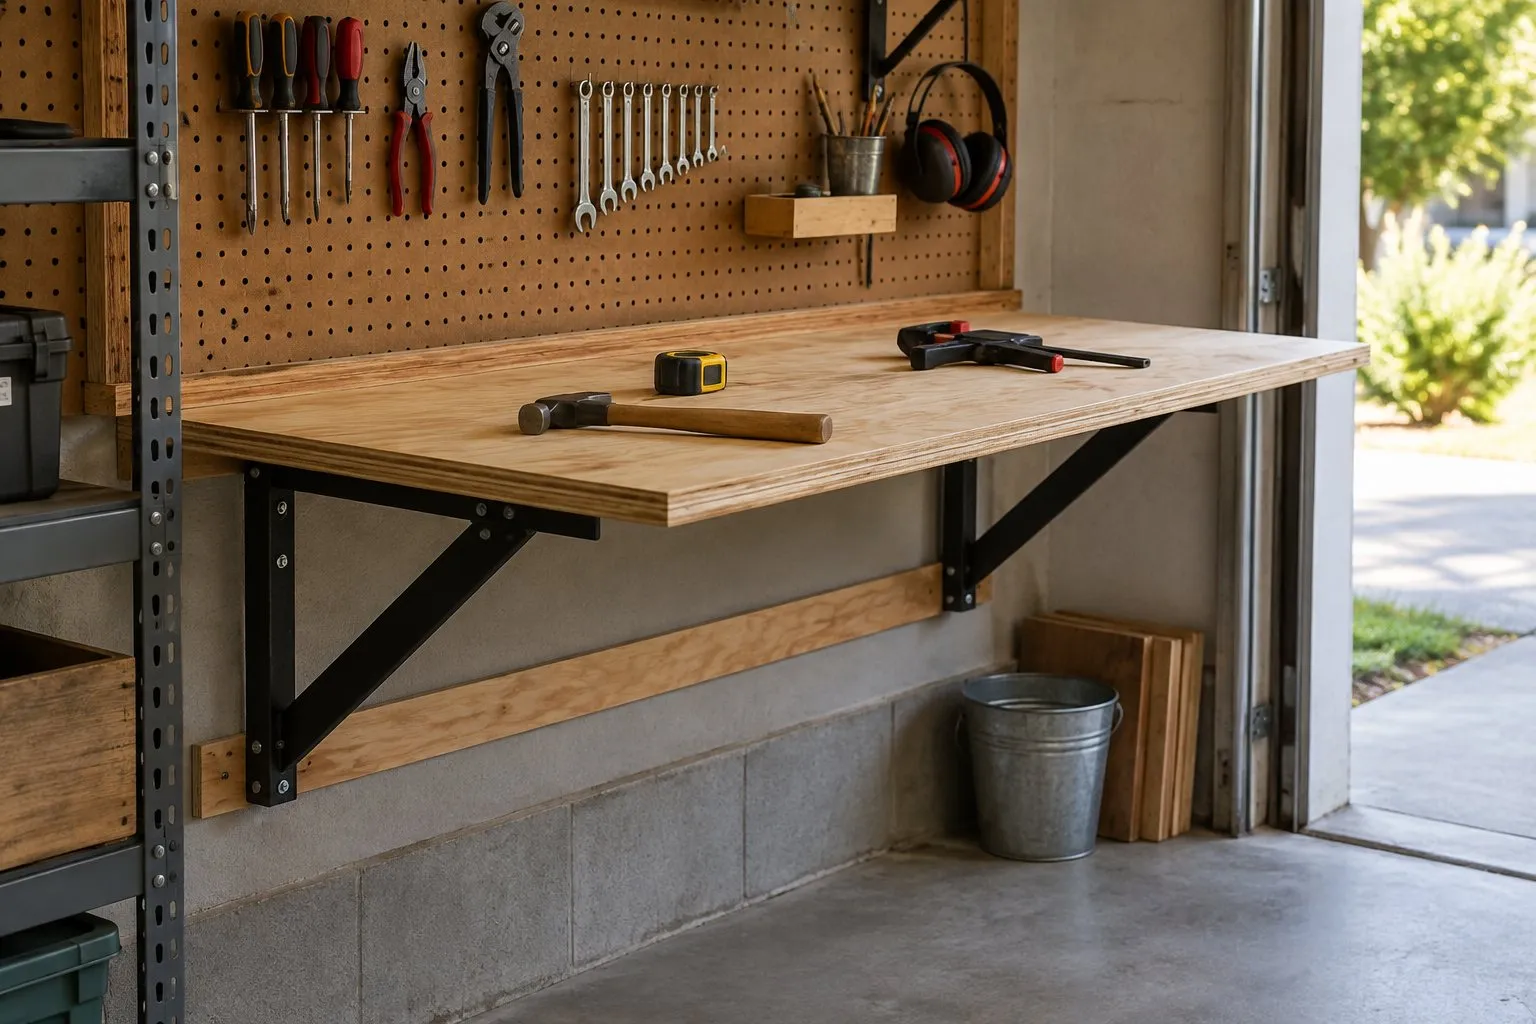
The result is a top that opens on two folding steel brackets and hangs flat against the wall when you release the latches. It is the same principle as a ready-made bracket table such as the VIVO workbench, only with a top cut to your wall. Neither Sugatsune nor Hardware Source gives a time for the job; plan extra time if a ledger board is needed.
If you are still deciding between building and buying, the comparison brackets or a ready-made table weighs both. This page assumes you build. Mounting a bought table is covered in the guide on how to install a wall-mounted folding table.
Tools and material
- Two folding shelf brackets, arm length close to the planned depth of the top
- A flat, stiff board for the top (plywood, solid wood or a laminated panel)
- Wood screws for the studs, long enough to reach well into the wood; short screws to fix the top to the arms
- Optional: a ledger board, if the brackets cannot both land on studs
- Stud finder, tape measure, pencil, level, drill with bits, saw, sandpaper
Check whether your brackets come with screws. Hardware Source, for example, says its folding supports take eight #10 (small) or #12 (large) screws each and that screws are not included. Sugatsune only says to choose screws or wall plugs suitable for the intended load. The screws that ship with cheap brackets are not matched to your wall.
Plan the top around the studs
This is the step that decides whether the table holds. Do it before you buy wood.
Stud spacing. Wood studs are 16 or 24 inches on center. The residential code table for wood studs (IRC Table R602.3(5)) lists 24 inches as the maximum for 2x4 studs carrying only a roof and ceiling and 16 inches when they also carry a floor. Measure your wall; do not assume.
Bracket spacing. Each bracket has to sit on a stud, so the distance between the two brackets is a multiple of the stud spacing. If that does not work for the top you want, screw a ledger board across at least two studs and fix the brackets to the board. The question can you mount a folding table on drywall without studs explains why anchors in drywall are no substitute.
Bracket length. As a rule of thumb, choose arms close to the depth of the top; we found no published standard. A shorter arm leaves more of the top unsupported, and the further out a load sits, the harder the upper screws are pulled out of the wall. The folding shelf brackets guide sorts the lengths and their listed load figures.
Example cut list
These are planning examples derived from stud spacing and the bracket rule of thumb above, not tested plans.
| Use | Wall | Bracket spacing | Bracket length | Top (width x depth) |
|---|---|---|---|---|
| Breakfast ledge or laptop spot | 16 in studs | 16 in | 16 in | about 24 to 32 x 16 in |
| Dining spot for two | 16 in studs | 16 in | 24 in | about 32 x 24 in |
| Dining spot for two | 24 in studs | 24 in | 24 in | about 36 x 24 in |
| Laundry or long desk | 16 in studs | 32 in | 16 in | about 40 to 48 x 16 to 18 in |
Keep the overhang equal on both sides so the load is shared by both brackets. None of our sources says that a third bracket raises a rating, so do not count on it.
Step by step
Find and measure the studs
Run a stud finder along the wall, mark both edges of each stud and measure the distance between the centers. Note any outlets or switches in the zone below the top: the brackets fold down there.Plan bracket spacing and top size
Choose two studs the right distance apart and mark the bracket centerlines on them. Cut the top to the planned width and depth, sand the edges and apply a finish if you want one.Mark the height
Decide where the finished top edge goes. For meals and seated work, about 29 to 30 inches above the floor is usual, inside the 28 to 34 inches the 2010 ADA Standards set for dining and work surfaces. Sugatsune measures from the floor to the underside of the table, so subtract the thickness of your top from the top edge and draw a level line there. The guide to mounting height covers bar and laundry heights.Screw the brackets into the studs
Unfold the brackets so they lock. Hold each wall plate on its stud with the top of the arm on the line, check it with the level, mark the holes, drill pilot holes and drive the screws into the center of the stud. VIVO's manual for its ready-made bench, for comparison, uses three holes per bracket in the center of a stud, drilled 3 inches deep.Fix the top to the bracket arms
Lay the top on the open arms. Leave a gap to the wall: Sugatsune notes the top must be lifted slightly to fold the bracket, and VIVO asks for at least 3/8 inch (10 mm) between the back of its top and the wall. Screw the top to the arms with screws shorter than the top is thick.Check the fold and the latches
Fold the table down and raise it several times. Both brackets must lock fully each time. Sugatsune says to lift the top slightly to take the load off before releasing the lock and to lower it carefully.
Typical mistakes
- Planning the top first, the studs second. The bracket spacing is set by the wall, not by the middle of the top.
- Brackets much shorter than the top. More overhang means more leverage on the upper screws.
- Forgetting the weight of the top. Sugatsune's guide says the weight of the table itself counts against the bracket capacity.
- Reading a bracket figure as what the table holds. Hardware Source rates its pair at 750 lb only when properly attached to the wall, and says proper attachment depends on the wall – wood studs, masonry and so on. Many listings do not even say whether a figure is per bracket or per pair. Why the fixing usually limits the load is explained on the page about weight capacity.
- No gap to the wall. Without it, the top binds when you try to fold it.
Safety
A falling top can injure. Screw into studs, a ledger board on studs or solid masonry, never into drywall alone. Do not exceed the bracket maker's rating, and keep children from hanging on an open top. Walls can hide cables and pipes; check before you drill, and ask a carpenter if you are unsure about screws or the wall.
Brackets or hinges – and the ready-made option
The brackets in our data are listed by sellers only, without a maker spec sheet: for a 24-inch-deep top the CLT 24 in stainless brackets*, whose listing tells buyers to mount them on studs, and for 16- to 18-inch tops the 16 in stainless brackets*. A drop-leaf with a fixed strip on the wall is built with hinges instead; see hinges for fold-down tables. A garage bench follows the same steps with a deeper top – the plan for that is the DIY folding workbench.
VIVO 43 x 18 Workbench
A 43-inch workbench top on steel brackets that folds to 2.3 inches from the wall.
Why here: If you would rather not build: a ready-made top on folding steel brackets, 43 x 18 inches, with 110 lb and the wall types (wood stud, brick or concrete) stated by VIVO.
Best for: Garages and basements with wood studs, brick or concrete walls
- VIVO names the wall types: wood stud, brick or concrete
- 110 lb capacity stated by the maker
- Folds to 2.3 in from the wall
- 3-year warranty (VIVO)
- Particle board top – not for wet work or heavy pounding
- Type
- Top on folding steel brackets
- Top size
- 43.3 x 18 x 1 in
- Load rating
- 110 lb (VIVO)
- Mounting
- Wood stud, brick or concrete (VIVO)
- Folded depth
- 2.3 in (VIVO)
- Warranty
- 3 years (VIVO)
Questions people ask
What hardware do I need for a DIY fold-down table?
Two folding shelf brackets with arms close to the depth of your top, wood screws long enough to reach well into the studs, short screws to fix the top to the bracket arms, and a board for the top. If the brackets cannot both land on studs, add a ledger board screwed across at least two studs. Some brackets come without screws; Hardware Source, for example, states that its supports need eight #10 or #12 screws each, not included.
How far apart should the folding brackets be?
A multiple of your stud spacing, so that each bracket sits on a stud: 16 or 32 inches apart on a 16-inch wall, 24 or 48 inches apart on a 24-inch wall. Measure the studs first. The top is then cut wider than the bracket spacing, with the same overhang on both sides.
Does the weight of the top count against the bracket rating?
Yes. Sugatsune's installation guide for its folding brackets says the weight of the table or shelf itself counts against the total load capacity. A heavy top therefore leaves less for what you put on it. Bracket listings often print a figure without saying per bracket or per pair, so assume the lower reading.
Can I build a fold-down laundry table the same way?
Yes, with 16-inch brackets under a 16- to 18-inch-deep top as a rule of thumb. For the height there is no official figure; a common rule of thumb is a top just below your elbow when you stand. Mark it, try it with a basket, then drill.
Sources
- Sugatsune: 388 Series – how to install heavy-duty folding shelf brackets
- Hardware Source: Heavy Duty Shelf Support (folding bracket), sizes, screws and pair rating
- 2012 Seattle Residential Code, Chapter 6, Table R602.3(5) Size, height and spacing of wood studs (IRC-based)
- VIVO: MOUNT-SF1FB instruction manual (PDF) – stud holes, gap to the wall, latches
- U.S. Access Board: 2010 ADA Standards, 902.3 Height of dining and work surfaces
Keep reading
- How-toHow to installInstall a wall-mounted folding table safely: find the studs, mark the top edge, drill per the manual and use a ledger board when the brackets miss a stud.
- Buying guideFolding bracketsFolding shelf brackets for a DIY fold-down table or workbench: which arm length fits your top, how to read load ratings, and how to land every bracket on a stud.
- Buying guideFold-down table hingesHinges for a fold-down table or desk: locking folding brackets, drop-leaf hinges with leaf supports, flap stays for desks and locking leg hinges, with maker data.
- ComparisonBrackets or ready-madeDIY top on folding shelf brackets or a ready-made fold-down table? Load data, stud spacing, size and effort compared, with a clear rule for when each one wins.
- How-toDIY folding workbenchBuild a wall-mounted folding workbench: size the top to your studs, screw a ledger board across them, mount 24-inch folding brackets and fit a top that folds.
Who writes here
wallmountedfoldingtable.com Editorial Team
Fold-down tables, desks & workbenches
We are the editorial team at wallmountedfoldingtable.com. We compare maker spec sheets, manuals, retailer data, building codes and anchor data for wall-mounted folding tables and turn them into plain-English advice – with sources on every page. We do not run lab tests or load tests, and we say so openly.
- Maker specs, manuals & codes compared
- Sources on every page
- No lab tests – stated openly
- Publisher details in the imprint